Norton Ghost by Symantec is my favorite disk cloning and imaging software because it’s easy to use but unfortunately the software cost money. Although the Norton Ghost software protection against piracy is not really that strict and I can use it on any computers, but I don’t want to risk getting caught using it illegally at customer’s place. Macrium Reflect is also another good Ghost alternative and the free version works well but we have to install the software in Windows and run it from there in order to create a full backup. The Macrium Live CDs can only be used to restore images but not for creating backup.
I’ve heard of Clonezilla before and it seems to be quite a hit because it is free and also clones computer pretty fast compared to other linux disk cloning software such as Partimage. I remembered testing Clonezilla last year but somehow didn’t really got it to work but today I had a little bit of free time and I was destined to get it to work. Well I am glad I did and was surprised that Clonezilla can make a full backup of my desktop computer with a very good speed. I am going to share with you on how to create a full backup of computer A and save the backup image to computer B via network. Why network? Because I don’t want to go through the hassle of unplugging the hard drive and connect it to another computer. This tutorial requires you to have a little knowledge on networking and user accounts.
You can either use Clonezilla Live CD or USB whichever is convenient for you. Making a Clonezilla Live CD is easy as you only need to download the ISO image file and burn it to a CD. To make a Clonezilla Live Bootable USB, the easiest way is to use Live USB Helper. Do take note that Live USB Helper requires the ZIP version of Clonezilla, not the ISO version.
Remember, this tutorial is based on a scenario to create a full backup of Computer A to Computer B. Before we can start the backup process, we’ll need to share a folder on Computer B first and assign a user to have write access to the folder. Once you’ve done that, follow the steps below.
1. Boot up Clonezilla Live on the computer that you want to backup.
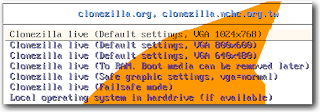
2. Hit enter to select the default “Clonezilla live (Default settings, VGA 1024×768)”
3. Choose your language and hit Enter.
4. Hit enter to select the default “Don’t touch keymap”
5. Hit enter to select Start Clonezilla.
6. Hit enter to select device-image. This selection will allow Clonezilla to save your hard drive or partition into an image file.
7. Select “samba_server” and hit Enter. This option is if you have another computer on the network which is running Windows and you want to save the backed up image to that computer’s shared drive.
8. Hit enter to select dhcp. If you are able to connect to the network and use the Internet by plugging in the network cable or using wi-fi, then 99% of the time you already have DHCP service running.
9. Enter the IP Address of the computer (Computer B) where you want to save the image to. You can also enter computer name.
10. Hit the tab button twice until the Cancel option is selected. Then hit Enter.
11. Enter a user account that is valid on Computer B that has permission to access the shared folder.
12. Enter the directory where Clonezilla image will be saved to. This is the name of the folder that is shared. For example, /images and hit Enter.
13. Hit enter when asked you to enter password.
14. Now type in the user’s account password followed by Enter.
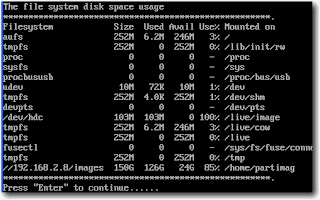
If you’ve entered a correct user account and password, it’ll show a list of file system disk space usage. Hit Enter again.

15. Hit enter to select Beginner mode.
16. You can now select if you want to backup the whole hard disk or just partition. To save local disk as an image, select savedisk and hit Enter.
17. Input a name for the saved image to use and click OK.
18. If you only have one hard disk, Clonezilla will automatically select the drive for you. Hit Enter to continue.
19. Hit Enter to continue.
20. Final confirmation. Press Y on your keyboard and hit enter.
Clonezilla will now start creating the image and simultaneously transfer it to Computer B shared drive. On a 100Mbps network, Clonezilla is showing a rate of 200MB/min. The whole processed of creating a full backup image of my Windows XP computer and saved it to another computer finished in just 7 minutes! Clonezilla is really impressive! This is only one example of how to use Clonezilla to make a backup image of a computer. You can also do disk to disk cloning and multicasting. By the way, the image file will be saved in gzip format, an open source file compression program. So you can extract the image file using any ZIP extractors to access the files.
Note: Been a very busy weekend. I will now start to compile all the entries for the BitDefender Internet Security 2010 and choose the winners by randomly shuffling the list. Sorry for the delay.


0 comments:
Post a Comment